自定义物品描述界面
默认配置
该配置文件应位于
plugins/GermPlugin/gui文件夹内
第一步,在服务端中新建tooltip.yml,并填入对应基础配置
#仅自定义描述界面拥有以下变量
# %tipX% 代表原tooltip 显示的X位置
# %tipY% 代表原tooltip 显示的Y位置
# %tipW% 代表原tooltip 显示的宽度
# %tipH% 代表原tooltip 显示的高度
# %tipS% 代表原tooltip 可显示的lore的行数
# %tipRealS% 代表原tooltip 可显示和不可显示的lore行数
# %tip0% 代表原tooltip 的标题
# %tip1% 代表原tooltip 的第一行
# %tip2% 代表原tooltip 的第二行
# .........
# %tip100% 代表原tooltip 的第一百行
# %tipLores% 代表所有lore
#
# 经过萌芽修改过的lore描述中可以用PAPI变量哦
#
#以下背景图栏位中 可见的常量数值 就是每块的大小
tooltip: #这里是自定义描述界面配置文件的名字 不可修改
  #该界面的私有选项
  private:
    #描述隐藏
    # %tip0_hide_prefix% 代表用prefix隐藏的第一行
    # %tip100_hide_prefix% 代表用prefix隐藏的第一百零一行 [其他隐藏功能请类同]
    # %tip0_hide_suffix% 代表用suffix隐藏的第一行
    # %tip0_hide_contain% 代表用contain隐藏的第一行
    # %tip0_hide_fragment% 代表用fragment隐藏的第一段
    #
    # %tipPrefixS% 代表用prefix隐藏的lore行数 [其他隐藏请类同]
    #
    # loreHide<->fragment@false 关闭片段隐藏功能
    # loreHide<->fragment@true 启动片段隐藏功能 [其他隐藏请类同]
    hides:
      #如果一行描述的开头为 prefix 所填写的 就不显示该行
      prefix: '[-]'
      #如果一行描述的结尾为 suffix 所填写的 就不显示该行
      suffix: '[-]'
      #如果一行描述中含有 contain 所填写的 就不显示该行
      contain: '[~]'
      #整段隐藏写法
      fragment:
        #如果一行描述等于 start 所填写内容 则开始隐藏接下来的每一行
        start: '[start]'
        #如果一行描述等于 end 所填写内容 则不再隐藏剩下的行
        end: '[end]'
    #相当于一个条件dos 有一个条件未达该玩家将无法打开自定义的tooltip
    conditions:
      # 当玩家看的tooltip有物品时候才显示(如果是在聊天框上悬浮出来的tooltip就没有物品)
      - 'str(%germmod_tooltip_has_item%,true)'
      # 以下条件为 玩家的等级大于-1 并且 玩家名字不等于笨蛋 并且 血量大于-1 才可看到自定义的tooltip
      - '%player_level% >= -1 && notStr(%player_name%,笨蛋)'
      - '%player_max_health% >= -1'
  #界面的参数设置
  options:
    # 此处startX完全不用修改
    startX: "0"
    # 此处startY完全不用修改
    startY: "0"
    # 请务必确保您配置的其他自定义界面中startZ设置的值均小于此处的值
    startZ: "400"
    #当玩家在此界面按下按键时触发
    keyDos:
      #当玩家按下左边的shift
      keyDown_42:
        - "loreHide<->fragment@false" #这里意为关闭片段隐藏器功能 当关闭后 原本被隐藏的会出现在lore上
      keyUp_42:
        - "loreHide<->fragment@true"
    openDos:
      # 让描述界面随着鼠标移动(不理解的话就不要进行改动)
      - "update<->thisGui@all"
      - "goto<->1"
  #这个画布组件是为了使得tooltip随着鼠标同步移动
  canvas:
    type: canvas
    # 此处locationX可以不用修改
    locationX: "%tipX%"
    # 此处locationY 请根据您自己的tooltip实际情况
    # 将带height的变量替换为 您的tooltip贴图切片中最左侧那一竖列图片组件的组件高度变量
    locationY: "if(h-%tipY%-%tooltip_canvas$p01_height%-%tooltip_canvas$p04_height%-%tooltip_canvas$p07_height%>=0,%tipY%,h-%tooltip_canvas$p01_height%-%tooltip_canvas$p04_height%-%tooltip_canvas$p07_height%)"
    #下面是对于各块背景图的组件配置
    #背景图一共要切割成九块,以满足不同行数的lore能够实现描述界面自适应
    #按照下方切割示意图中的红线切割即可得到对应九块图片
    relativeParts:
      p01:
        type: texture
        path: "local<->textures/gui/tooltip/p01.png"
        locationX: "0"
        locationY: "0"
        width: "39.3"
        height: "41.1"
      p02:
        type: texture
        path: "local<->textures/gui/tooltip/p02.png"
        locationX: "%tooltip_canvas$p01_width%"
        locationY: "0"
        #适应宽度
        width: "if(%tipW%-%tooltip_canvas$p01_width%>0,%tipW%-%tooltip_canvas$p01_width%,1)"
        height: "%tooltip_canvas$p01_height%"
      p03:
        type: texture
        path: "local<->textures/gui/tooltip/p03.png"
        locationX: "%tooltip_canvas$p01_width% + if(%tipW%-%tooltip_canvas$p01_width%>0,%tipW%-%tooltip_canvas$p01_width%,1)"
        locationY: "0"
        width: "43.2"
        height: "%tooltip_canvas$p01_height%"
      p04:
        type: texture
        path: "local<->textures/gui/tooltip/p04.png"
        locationX: "0"
        locationY: "%tooltip_canvas$p01_height%"
        #适应高度
        width: "%tooltip_canvas$p01_width%"
        height: "if(%tipH%-%tooltip_canvas$p01_height%>0,%tipH%-%tooltip_canvas$p01_height%,1)"
      p05:
        type: texture
        path: "local<->textures/gui/tooltip/p05.png"
        locationX: "%tooltip_canvas$p01_width%"
        locationY: "%tooltip_canvas$p01_height%"
        #适应高度且适应宽度
        width: "if(%tipW%-%tooltip_canvas$p01_width%>0,%tipW%-%tooltip_canvas$p01_width%,1)"
        height: "if(%tipH%-%tooltip_canvas$p01_height%>0,%tipH%-%tooltip_canvas$p01_height%,1)"
      p06:
        type: texture
        path: "local<->textures/gui/tooltip/p06.png"
        locationX: "%tooltip_canvas$p01_width% + if(%tipW%-%tooltip_canvas$p01_width%>0,%tipW%-%tooltip_canvas$p01_width%,1)"
        locationY: "%tooltip_canvas$p01_height%"
        #适应高度
        width: "%tooltip_canvas$p03_width%"
        height: "if(%tipH%-%tooltip_canvas$p01_height%>0,%tipH%-%tooltip_canvas$p01_height%,1)"
      p07:
        type: texture
        path: "local<->textures/gui/tooltip/p07.png"
        locationX: "0"
        locationY: "%tooltip_canvas$p01_height% + if(%tipH%-%tooltip_canvas$p01_height%>0,%tipH%-%tooltip_canvas$p01_height%,1)"
        width: "%tooltip_canvas$p01_width%"
        height: "26.4"
      p08:
        type: texture
        path: "local<->textures/gui/tooltip/p08.png"
        locationX: "%tooltip_canvas$p01_width%"
        locationY: "%tooltip_canvas$p01_height%+ if(%tipH%-%tooltip_canvas$p01_height%>0,%tipH%-%tooltip_canvas$p01_height%,1)"
        #适应宽度
        width: "if(%tipW%-%tooltip_canvas$p01_width%>0,%tipW%-%tooltip_canvas$p01_width%,1)"
        height: "%tooltip_canvas$p07_height%"
      p09:
        type: texture
        path: "local<->textures/gui/tooltip/p09.png"
        locationX: "%tooltip_canvas$p01_width% + if(%tipW%-%tooltip_canvas$p01_width%>0,%tipW%-%tooltip_canvas$p01_width%,1)"
        locationY: "%tooltip_canvas$p01_height%+ if(%tipH%-%tooltip_canvas$p01_height%>0,%tipH%-%tooltip_canvas$p01_height%,1)"
        width: "%tooltip_canvas$p03_width%"
        height: "%tooltip_canvas$p07_height%"
      #创建一个物品展示槽位
      #这个槽位仅仅用来展示物品描述界面所对应的物品,不建议修改interact与invaild设置
      slot:
        type: slot
        #槽位的宽和高(可以使用 w h) 例如:size: 'w*0.1' 或 size: 'h*0.1' 或 size: ' w / h * 0.1'
        size: "20.4"
        #是否是禁止所有状态(无法点击,没声音,悬浮无变化)
        invalid: true
        #是否允许与该槽位交互(可以点击,有声音,但是无法进行任何操作)
        interact: true
        #任何界面中identity都不能用一样的 防止槽位的物品混乱
        #不建议修改该行配置
        identity: "germmod_tooltip"
        #当槽位内有物品时显示的图片
        fillPath: 'local<->textures/gui/tooltip/slot.png'
        #当槽位为空的时候显示的图片
        emptyPath: 'local<->textures/gui/tooltip/slot.png'
        locationX: "8"
        locationY: "18"
      #物品描述的配置
      #title设置的是物品描述界面对应物品的名称所在位置
      title:
        type: label
        align: "center"
        scale: '1.2'
        texts:
          - "%tip0%"
        locationX: "(%tooltip_canvas$p01_width% + if(%tipW%-%tooltip_canvas$p01_width%>0,%tipW%-%tooltip_canvas$p01_width%,1) + %tooltip_canvas$p03_width%) * 0.5"
        locationY: "2"
      #lore2与lore3设置的是物品描述界面对应的物品的lore所在位置
      #你可以通过新增多个文本组件来合理的排列你的物品lore
      lore2:
        type: label
        align: "left"
        scale: '1.0'
        texts:
          - "%tip1%"
          - "%tip2%"
          - "%tip3%"
          - "%tip4%"
        locationX: "34"
        locationY: "20"
      lore3:
        type: label
        align: "left"
        scale: '1.0'
        texts:
          - "%tip5%"
          - "%tip6%"
          - "%tip7%"
          - "%tip8%"
          - "%tip9%"
          - "%tip10%"
          - "%tip11%"
          - "%tip12%"
          - "%tip13%"
          - "%tip14%"
          - "%tip15%"
          - "%tip16%"
          - "%tip17%"
          - "%tip18%"
          - "%tip19%"
          - "%tip20%"
          - "%tip21%"
          - "%tip22%"
          - "%tip23%"
          - "%tip24%"
          - "%tip25%"
        locationX: "12"
        locationY: "60"

第二步,根据自身需求修改Lore显示行数吧 😝
多样化物品描述界面
根据物品的lore来匹配出不同背景的物品描述界面吧
第一步,准备不同的物品描述背景图片


第二步,配置tooltip.yml
#主界面tooltip仅填写配置节点tooltip.options.openDos的内容
#如有需要也可增加配置节点tooltip.private的内容
tooltip:
  options:
    openDos:
      - "condition<->exist(%tip2%,红色)@[红色显示,青色判断]@[青色判断,青色显示]" #此处意为 如果物品描述第二行含有红色二字那么运行标记[红色显示]到[青色判断]之间的dos 否则运行标记[青色判断]到[青色显示]之间的dos
      - "mark<->红色显示"
      - "openChild<->tooltip_红色品级"
      - "mark<->青色判断"
      - "condition<->exist(%tip2%,青色)@[青色显示,默认颜色]@[默认颜色,结束判断]"
      - "mark<->青色显示"
      - "openChild<->tooltip_青色品级"
      - "mark<->默认颜色"
      - "openChild<->tooltip_灰色品级"
      - "mark<->结束判断"
#接下来是各种情况下的界面配置
tooltip_红色品级:
  private:
    hides:
      prefix: '[-]'
  options:
    startZ: "350" #此处是为了不让界面内其他组件阻挡lore界面
    openDos:
      - "update<->thisGui@all" #此处是为了让lore界面跟随鼠标走
      - "goto<->1" #此处是为了让lore界面跟随鼠标走
  background:
    type: 0
    path: "textures/lore/background_red.png"
    width: "64"
    height: "80"
    locationX: "%tipX%"
    locationY: "%tipY%"
tooltip_灰色品级:
  private:
    hides:
      prefix: '[-]'
  options:
    startZ: "350"
    openDos:
      - "update<->thisGui@all"
      - "goto<->1"
  background:
    type: 0
    path: "textures/lore/background_gray.png"
    width: "64"
    height: "80"
    locationX: "%tipX%"
    locationY: "%tipY%"
tooltip_青色品级:
  private:
    hides:
      prefix: '[-]'
  options:
    startZ: "350"
    openDos:
      - "update<->thisGui@all"
      - "goto<->1"
  background:
    type: 0
    path: "textures/lore/background_cyan.png"
    width: "64"
    height: "80"
    locationX: "%tipX%"
    locationY: "%tipY%"
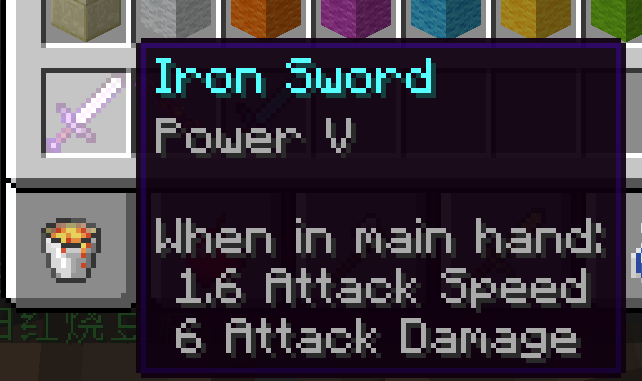
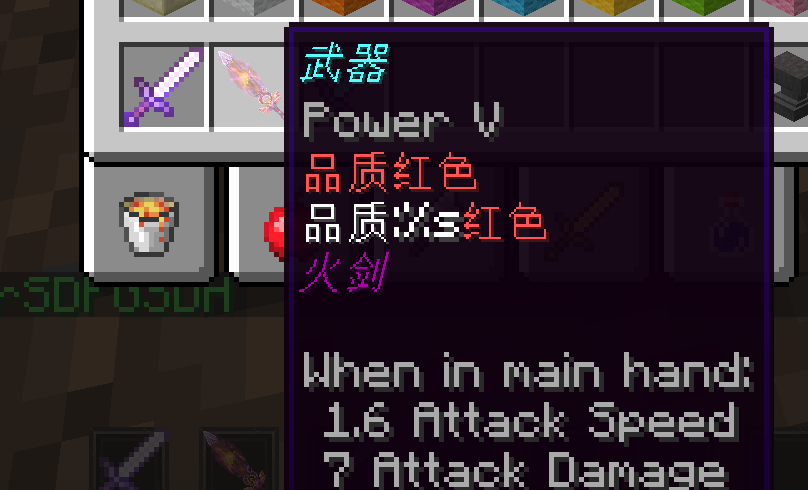
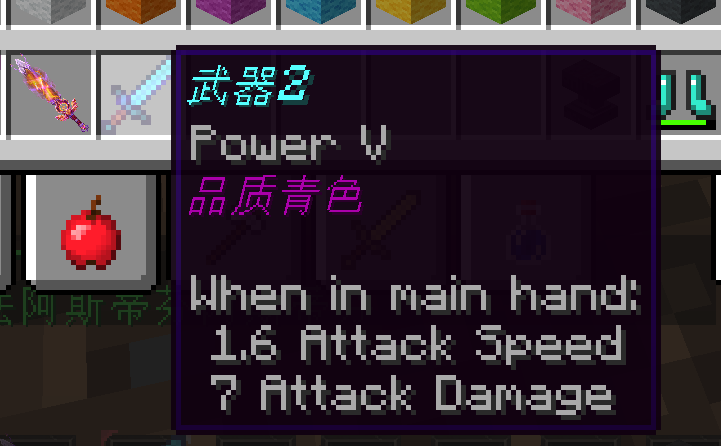
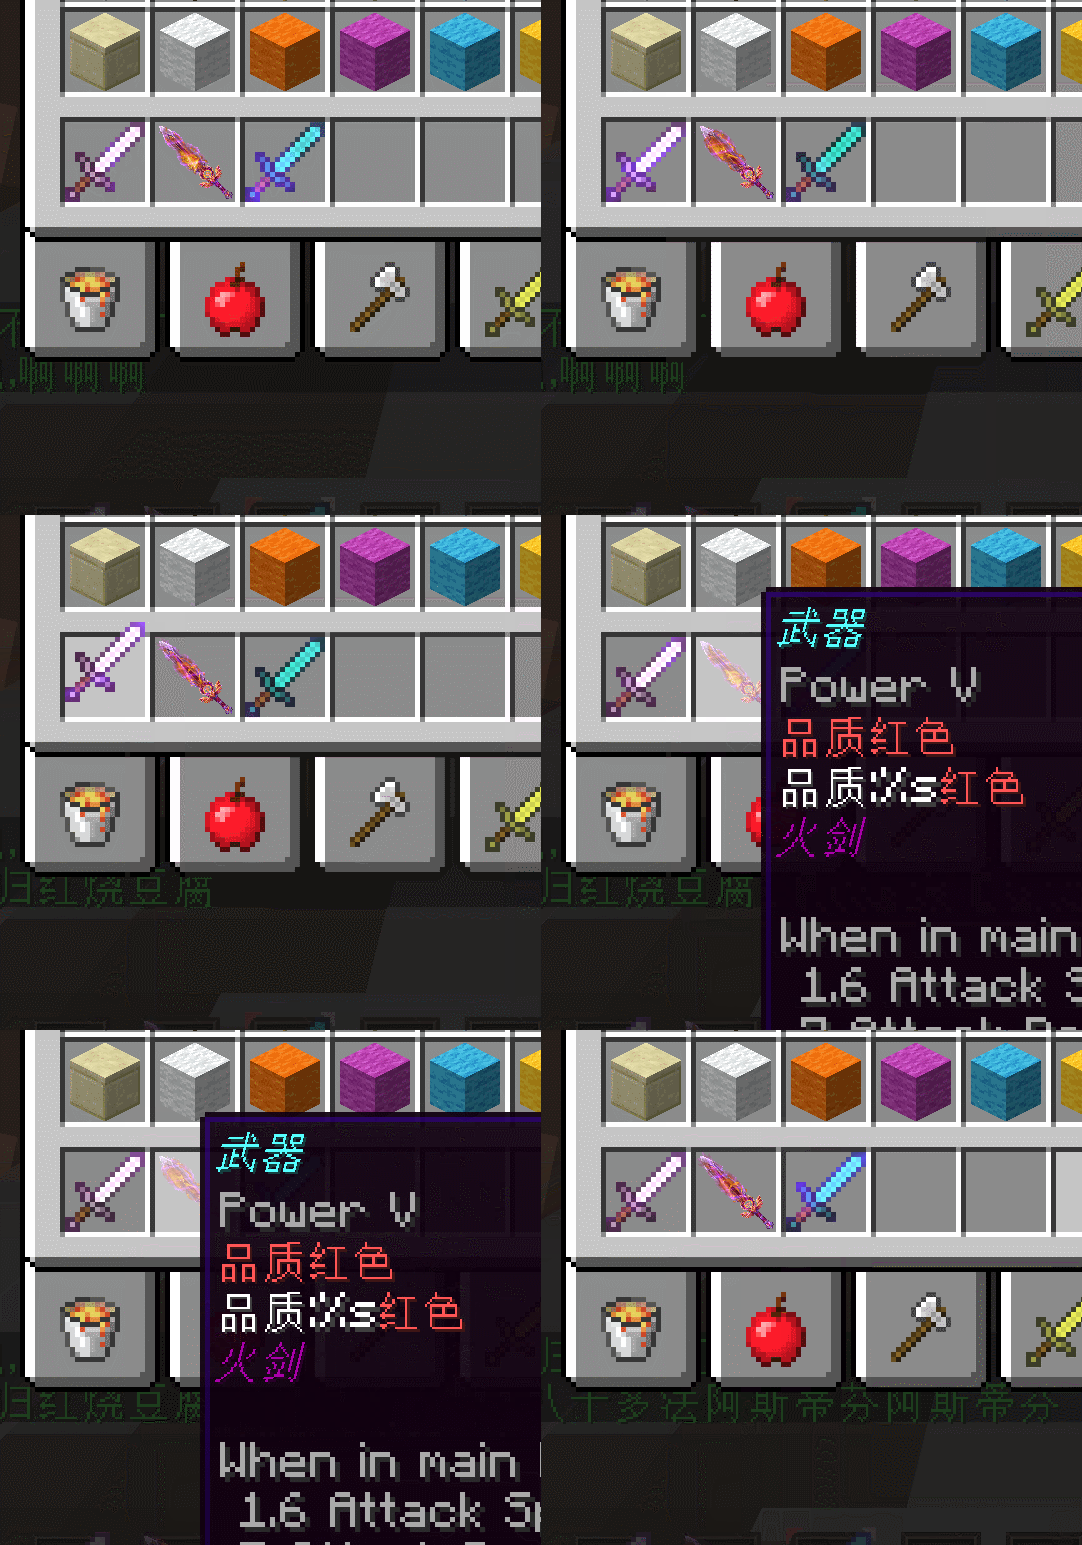
将配置正确的安置到服务端中时,如果有这样描述的三个武器


他们会被显示为
